Front Garden

Front Garden
Full Bloom

Wednesday, January 23, 2013

Seed Saving And Starting Zinnias Update (2) 01-23-2013

Here is an update of how the zinnia is doing. You can see the growth rate from the picture.

Here is my original post link:

Seed Saving And Starting Zinnias


http://backyardorganicgardener.blogspot.com/2012/12/seed-saving-and-starting-zinnias.html

This is what the zinnia started in this post looks like today. I blurred the information on the stick because it has somebodies name on it. They will get this plant in a couple of months. I transplanted it in a discarded green pot. Looks like it just came from a commercial greenhouse. 

I don't strive for maximum growth because where I live the plants can't go outside until approximately June 1st.  I want to develop healthy roots and I leave lots of time (1 month) for hardening. I give the plants 12 hours of light per/day. The room is about 65F. For me slow and steady wins the race.

I started these on 1/19/2013.
I started this one on 12/24/2012.
I start the zinnias in peat pots and then transfer them to soil filled peat containers. I do this to minimize disturbing the root systems. The roots grow out of the small pot and into the soil in the bigger pot. The entire big pot will be transplanted into the soil. The peat pot degrades and provides nutrition for the plant. The peat pot provides the roots with a stiff structure to grow into and makes transplanting easy.

There are many ways to to it. This works for me.

I tend to start things too early because I want to make sure I have them at the right planting time. You can't reverse time. I don't want to miss my window. Besides, I love zinnias!

Here are some Zinnia California Giants getting ready to be potted.

Wednesday, January 16, 2013

Neem Oil - It Stops Aphids From Damaging My Flower Seedlings - 01-17-2013

Every year I start my seedlings indoors. And right on schedule, aphids appear and start dining on my tender juicy seedlings. But I have found something that helps minimize the damage, Neem oil!

I buy a bottle of concentrated Neem oil. I create a diluted concentration with water, per the instructions on the container, in a handy spray bottle. I apply a fine spray (all surfaces of the plant), at least once a day. After a week the aphids go away.

During the first application, you may see a few aphids fall off. The rest look unaffected. Don't worry, come back the next day and spray (remember, all surfaces of the plant).

Make sure you shake the spray bottle well before every application.

I always wear eye protection and highly recommend you do before spraying.

Check with other sources on the Internet for more details on how it works and proper applications.

I do not use Neem oil on anything I am going to eat. I use it only on flowers.

I have used it successfully on geraniums, zinnias, rudbeckia, coneflowers, and marigold seedlings.

Tuesday, January 15, 2013

Gooseberries - Picture Of The Day 1-16-2013

I have 3 green and 3 red gooseberry bushes. They are 5 years old.

Here is one of the bushes. You can see the berries in development.
I like them because they produce ripe berries relatively early in the season.

The green gooseberries get small caterpillars that eat the young leaves. The red gooseberries don't have this issue. 

I get about 6 pints of berries. I eat them fresh or make jam out of them. 

The bushes have sharp thorns but they are easy to avoid. 

Worm Composting (Part 2) -The Greatest Thing Since Sliced Bread


I received a big response to my Worm Composting post I decided to post a supplement.


Here is a completely processed deck. The color is uniform and not a lot of worms. They have moved upwards to decks with food.
 I wrap a plastic shopping bag around my hand and scrape the casting into a plastic container.
 The white stuff is unprocessed egg shells.
 Here is the back side of the deck ready to be scraped.
After scraping, I wash the deck off at my outdoor faucet.

The clean deck ready for re-use.
Here is another deck ready to be cleaned.
 A close up of the worm casting.
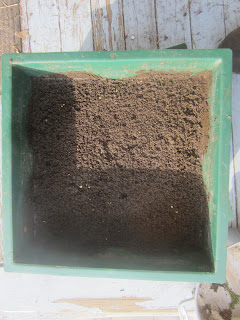
 Worm casting from 2 decks. I'll let it dry out. I will then screen it any remove any oversize pieces.
 My "to be shredded" box.
 In process of shredding.
 I "recycle" things I find.

Two more decks, filled with paper and cardboard, ready to to start the cycle all over again.

.

Saturday, January 12, 2013

Worm Composting -The Greatest Thing Since Sliced Bread


I highly recommend getting a worm composter. I have two in my office and they make great worm castings (worm crap).  It is nature's natural fertilizer.

You buy the bin and the worms. You add non-processed kitchen scraps and shredded paper. The worms break down the contents of the tray. They multiply and in a couple of months the thing really kicks in and processes kitchen scraps quickly.

Once the lower deck tray gets filled you just add a tray ion top. The worms complete their work on the lower deck and move upward searching for food. You just clean out the lower decks, store the worm casting in a plastic container,  and the clean decks are available for new processing.

You have to drain excess water  (once a month for me) using the drain plug at the bottom of the bin. The water is a great compost tea. No smells, no mess, and the red worms are inside the bins. They shy away from light so they won't go anywhere. Use red worms, not night crawlers. They just leave the bins and end up all over your house. The instructions on a commercial bin explain everything.
Here is a close-up of the stacked trays on one of my worm composters. The lower decks have finished worm casting ready for use in the garden.  When the weather gets warm I'll take them outside for cleaning.
Here is some carrots tops put in the bin a month ago. You can see them slowly breaking down. I was lazy and didn't chop them up. Egg shells are good for the worms. They promote reproduction.
I just added some small carrots to the working bin.
After throwing in some food, I always add a handful of paper, then I just close the top.
Here is a picture of a deck where the worms are busy doing their thing.
A picture of the worms doing residual work on a lower deck.
A finished deck filled with worm casting.
A different finished deck.

Thing I put in the bins:
     Shredded junk mail (no plastic)
     Shredded newspaper
     Shredded cardboard 
     Residual vegetables (all parts). The smaller the pieces, the better. 
     Egg shells (stimulates worm reproduction)
Thing I don't put in the bins:
    Fruit scraps (works great but the fruit flies take over the house)
    Processed foods
    Onions (too acidic)
There are plenty of resources on the Internet on what can go in the worm bins.


A great article in the NY Times:


Worms Produce Another Kind of Gold for Growers

Here is the link:

http://www.nytimes.com/2013/01/01/science/worms-produce-another-kind-of-gold-for-farmers.html?_r=0


I highly recommend a worm composting bin to create great low cost organic plant food for your garden!

Wednesday, January 9, 2013

Tree Peony - Picture Of The Day 01-09-2013

I have a 7 year old tree peony. Here is one of the blooms.  I chose a traditional Chinese color. The blooms come out in mid-June.


Right now the tree is covered with snow. It stands about 3 feet tall and I get about 10 blooms.

Monday, January 7, 2013

Weeds Have Their Place In My Garden


When I first started gardening the biggest thing I was told by the experts was, "Keep up with the weeding and don't let them in, you'll never get rid of them." So, I kept up, most of the time, with the weeding. 

But I soon discovered something. Insects love weeds. Bees of all types were in the weeds. There were more insects around the fringe of my "perfect" garden than there were in the "weed free" areas. The light bulb came on over my head and this is what I do to promote a balanced garden that requires no insecticide spraying. 

I keep 2- 4' X 6' sunny raised bed sections of the garden as designated "weed" areas. As I do my weeding in the garden, I put the pulled weeds in the weed "OK" area. You don't have to get fancy. Sometimes I plant them and sometimes I just toss the weed into the area. I don't have to worry, the weeds will show up.

Dandelions, from the small front lawn,  are put in the weed zones and left alone. I use dandelion leaves in my salad. 

I get a lot of unknown flowers and they certainly attract pollinators. I read somewhere that these areas are great to produce beneficial insects. 

I even put a couple of homemade toad houses, stones, small containers of water, and small logs in the areas and sometimes toads show up. 

I treat these areas as equally important to other parts of the garden. They attract the first and last bees. 

 So as you can see, I like weeds as long as they know their place!

Tuesday, January 1, 2013

Lily - Picture Of The Day 01-02-2013

Posting a quick picture of one on my lilies.  When in bloom it stands about 6 feet tall.  The picture was taken in late July.


I mulch the lilies in the late Fall and early Spring. I also throw some rotted cow manure on them in the late Fall before the ground freezes.